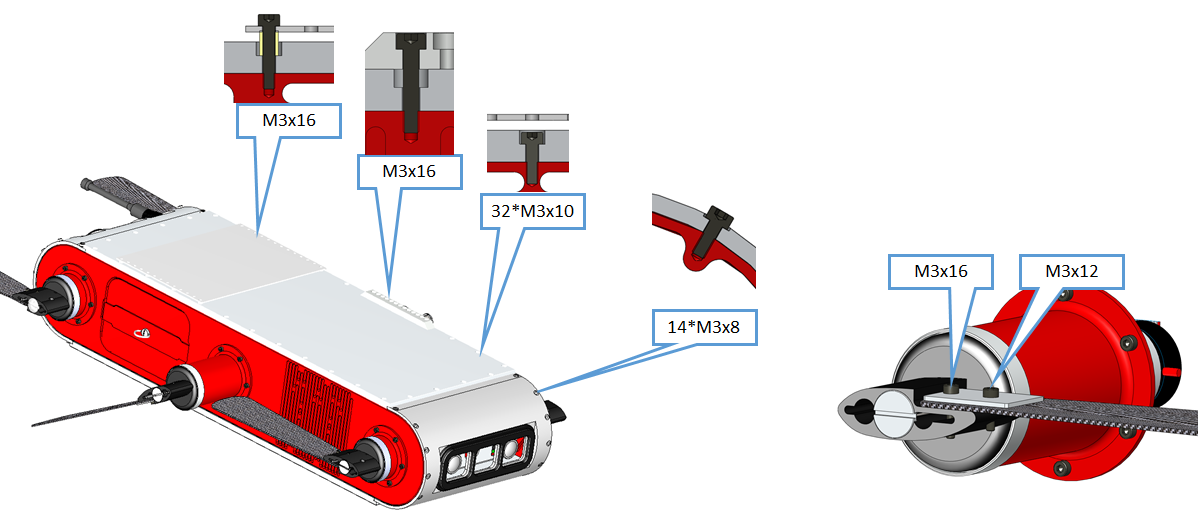
| Connects | Quantity | Size | Length | Remarks | Ordering ref |
|---|---|---|---|---|---|
| Top or Bottom lid to Main Body | 32 | M3 | 10 | See note #1 |
McMaster 91292A113 |
|
Front or Back Ends to Main Body |
14 | M3 | 8 | See note #1 |
McMaster 91292A113 |
|
Mirror to the front or back end |
6 | M3 | 10 |
Replaces M3x8mm fasteners holding panel to body. |
McMaster 91292A113 |
|
Top plate with anode |
? | M3 | 10 |
Just use the same screw. Tight the screw only enough to hold the anode in place. |
|
|
Top plate with ballast |
? | M3 | 14/16 |
With the 6mm spacer. Tight the screw only enough to hold the ballast in place. |
McMaster 92290A118 & 92290A120 |
|
Flippers on the hip |
1+1 | M3 | 12 & 16 | ||
|
Ballast to Top or Bottom lid |
? | M3 | 6mm |
M3 NYLON 6MM ROUND SPACER |
Digikey 952-1529-ND |
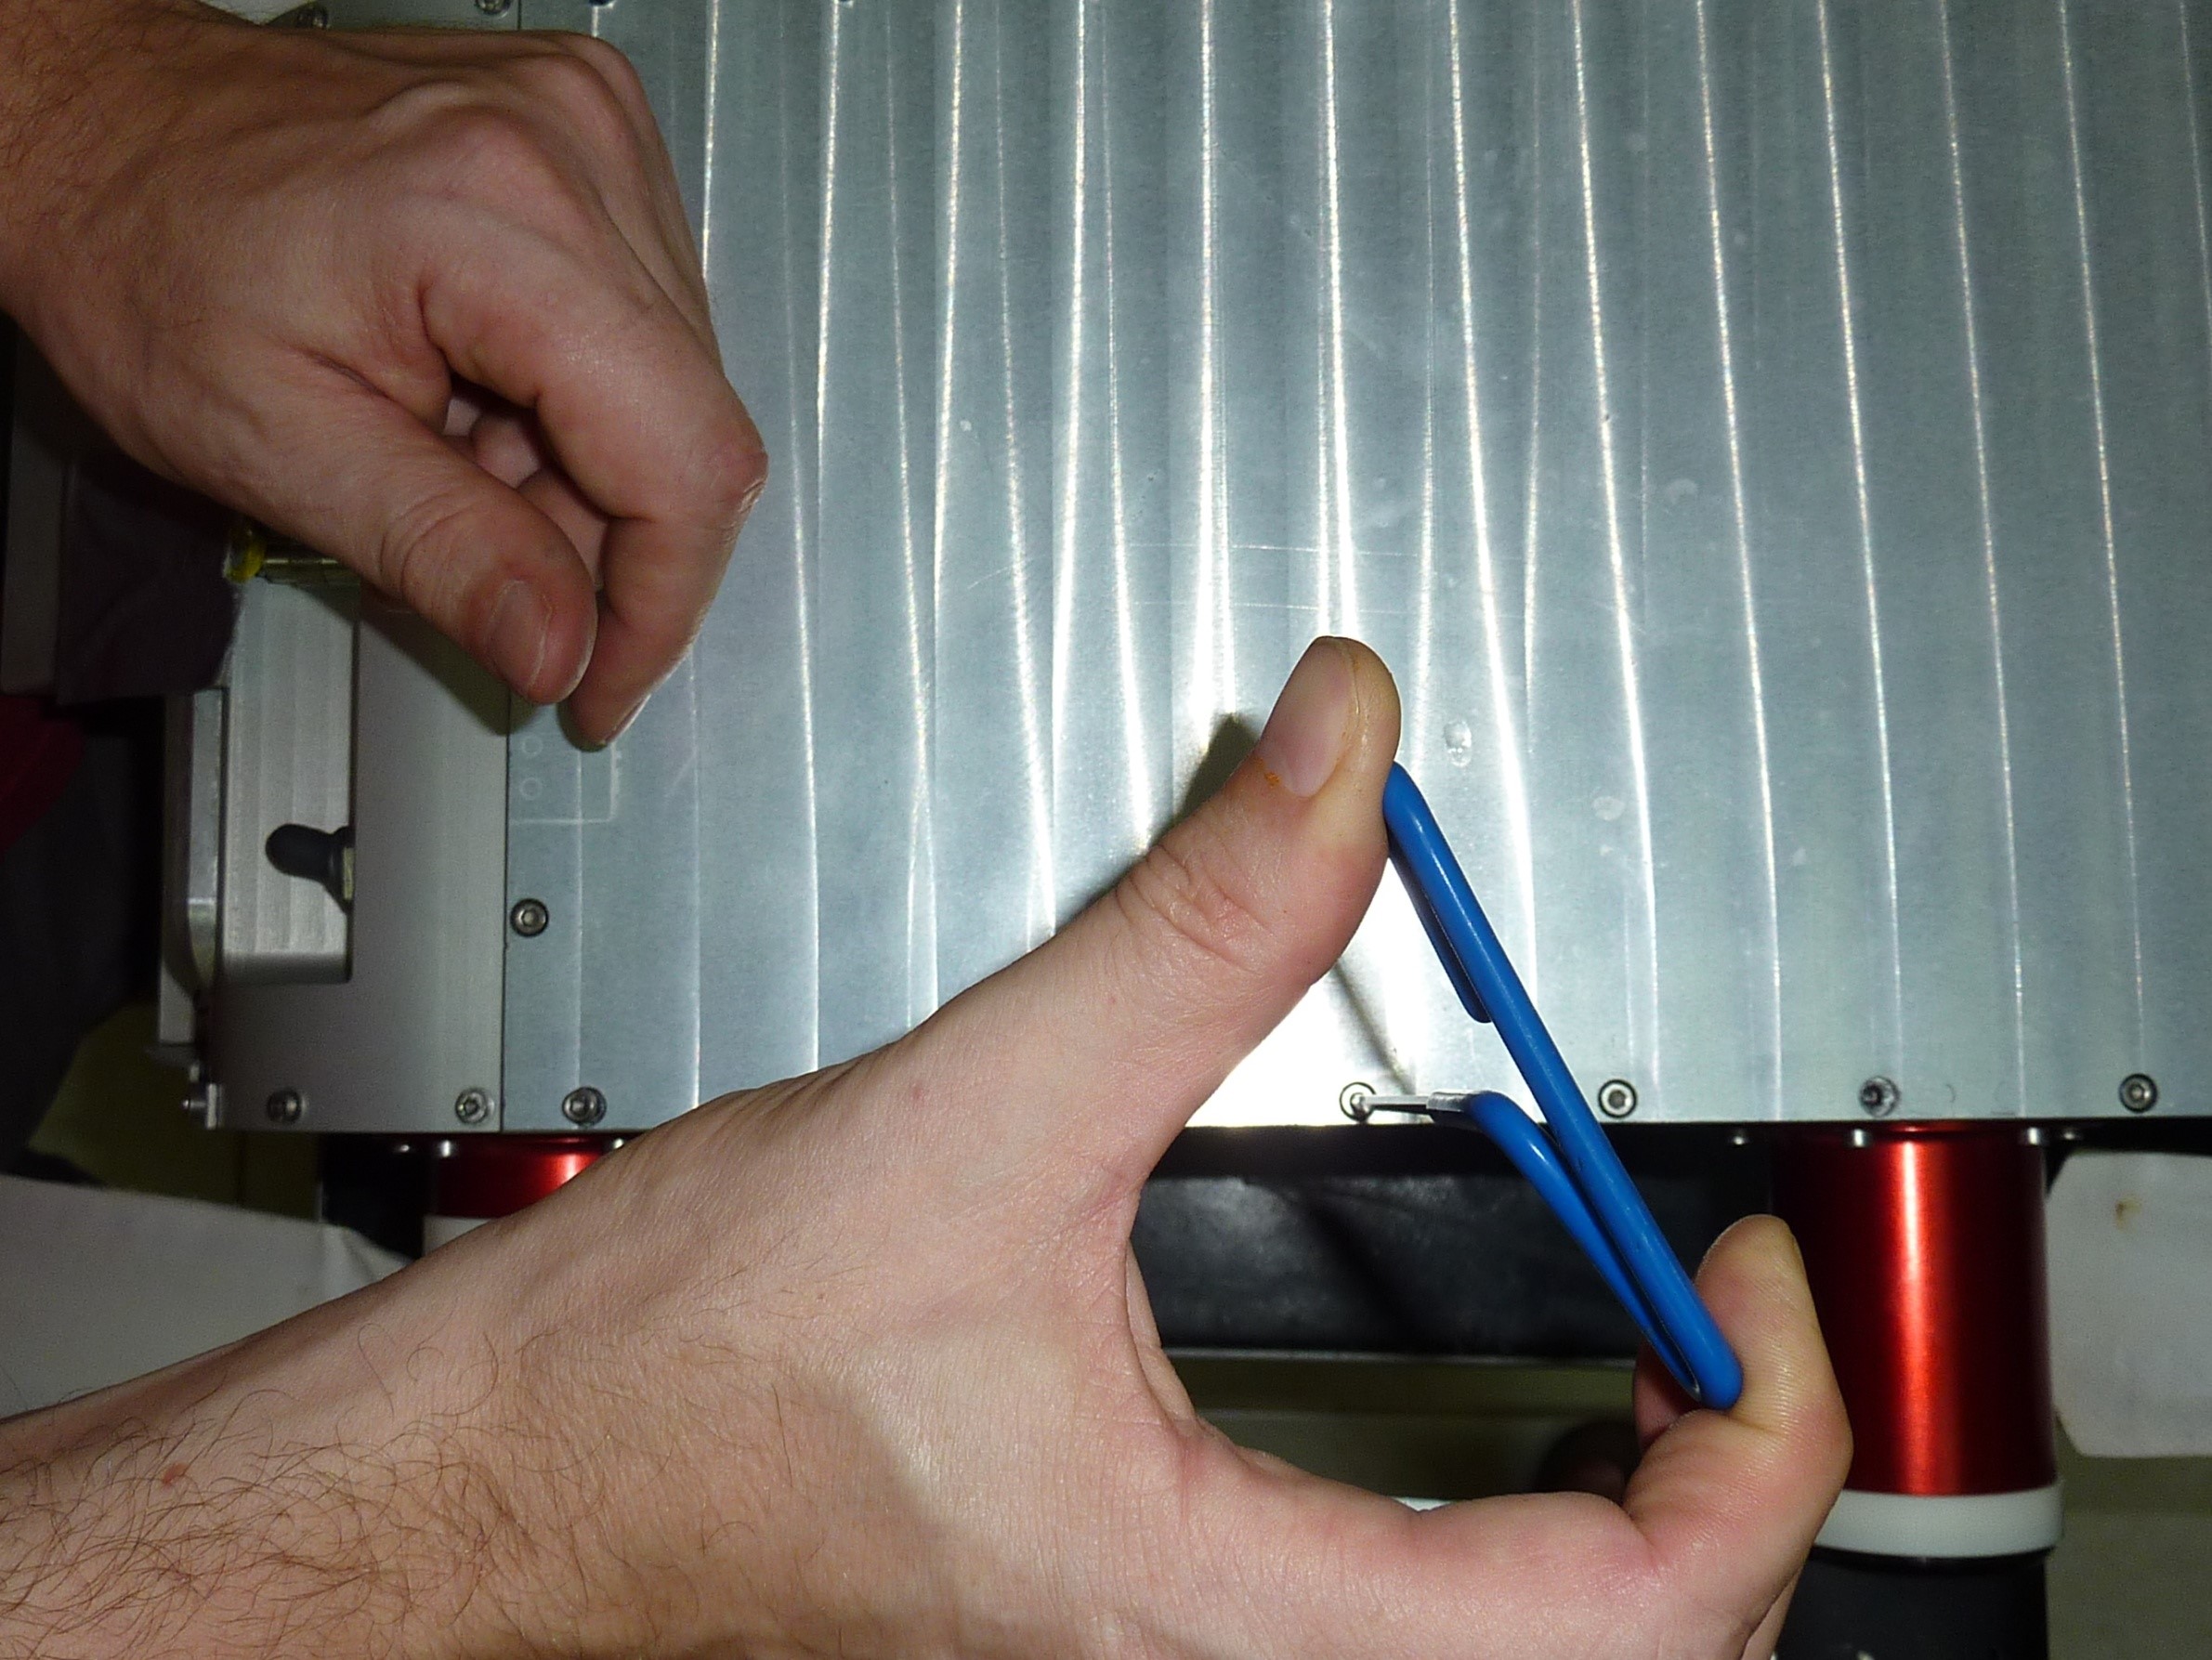
Note #1: The screws should be hand tightened (no power tools). When the screws are tightened, a good rule of thumb is for the Allen-key to bend slightly as in Figure below. Do not apply excessive force because there is a danger of stripping the threads in the main body. Secure attachment of all sealing surfaces is crucial in preventing water from entering the device. As such it is very important ensuring that all screws are properly tightened, especially along the surface of the vehicle, to ensure proper sealing of the vehicle. It is good practice to verify all screws prior to vehicle deployment.
Tightening the screws. Note the deflection on the Allen-key.
Overall, you should keep three basic rules in mind:
Rule#1: never use two neighboring holes for ballast plates or anodes. This weakens the structure.
Rule#2: when you replace the M3x10, you place M3x16 for the anodes, and M3x16 for the ballast with the 6mm spacer (Digikey 952-1529-ND). When you tighten the screws, you only want to hold the attached thing in place, and not tight the screw as you do normally (note #1). If you tighten too much, you will break the anode, or the spacer accordingly. Anodes must be in electrical contact with the shell. (not on spacers).
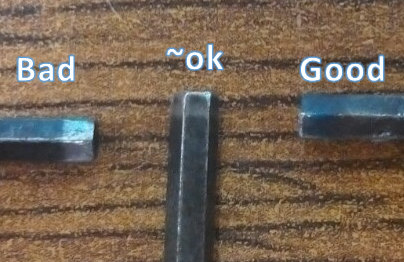
Rule #3: Wrong length on the screw can lead to leaks. Too long screw won’t be tight enough, too short might not hold parts together. If not sure, measure the length of the screw prior to installation following the image below:
- ALWAYS use a sharp Allen-key, as damaged or worn out tools can destroy the head of the screw and make your life very miserable. The tip of an Allen-key can be cut off by dremel.
- Unscrew for half round all screws, moving in series around the perimeter of the lid. You will hear a noise that indicates the ‘unlocking’ of the screw.
- With the same pattern as before, unscrew them for half more round.
- You should be able to unscrew them completely now.
- Store the top shell in a clean space, and keep the area of contact with the body seal safe from dirt or scratches. Even the smallest scratch can cause leaks.
- Place the screws just removed in a container and spray them with WD40 (at least when the robot was in salty water)
- If you have to place the robot with the open side in contact to the surface, put the lid on and secure it with 4 screws to prevent damages on the body seal.
To install the top or bottom lid:
- Make sure the body seal is free of hair, dust, dirt, sand, or any other particles. A good medium to wipe it is the foam that is in the pelican cases.
For waterproof housings as used in cameras the common advice is:
* clean the groove the o-ring was in. First remove the o-ring; wipe out any dirt from the groove using a q-tip, with a clean lint-free paper towel underneath it.
* Gently wipe off the o-ring, being very careful not to stretch it. I usually wipe the o-rings off with my fingers, gently feeling for any dirt or particles. Obviously your hands need to be very clean.
* Wash the o-ring off if it has sand on it that won't come off, or if it is really dirty.
* Use an air-blower to blow off any hairs or dust from the groove, and relubricate the o-ring with a small amount of lubricant. Not too much and not too little.
* Look at the o-ring one last time, and again being careful not to stretch the o-ring, place the o-ring back in.
- Check the top-bottom lid for dirt, ESPECIALLY where it comes in contact with the body seal.
- Make sure you connected everything,
- Check the robot for cables or anything coming out.
- Check again.
- Grease the body seal. It just must feel wet, excessive grease will damage the seal.
- Place the lid on the robot.
- Place 6 screws first, one at each corner and two above the middle hips. Tighten them up until in contact with the lid. NOT ALL THE WAY DOWN.
- Place and screw the rest of the screws until in contact with the lid.
- Start screwing in a circular way, only until the lid comes in contact with the body.
- Now you can tighten all screws as in note #1 above.
Replacement of the front or back ends are not meant be done by the user. This will be described in the service/building manual.